The main purpose of this was a repair to the air heater box, which is described separately in this thread, and I also fixed a courtesy light switch amongst other minor repairs; the purpose of this post is to document the dash removal process itself.
First (and I accept this seems an odd place to start) remove the rear seat squabs. They are held by tabs underneath - pull up the back of the squab (don't be cautious, they will bend a long way without breaking) and slide it backwards.
Beneath the back edge of the rear seat squabs there will be a couple of tabs on each sides holding the seat back panel down; unscrew these tabs from the body shell.
Open the storage box in the central panel and undo the 4 screws holding it in place, and remove the box.
Remove the trim panel that includes the gaiters around the handbrake and gearstick; there is a single screw at the back of the panel, the front is just wedged into place.
Undo the two screws at the front of the main transmission tunnel trim. You should now be able to remove this whole trim part; the rear end is somewhat trapped in place by the rear seat panel, which will have to be lifted up a fair bit to get the trim out.
Now we move on to the steering wheel and column. Ideally you want to remove the steering wheel with its boss, by loosening (but not removing) the central nut (hiding underneath the padded panel and horn button, which just pull off), breaking the steering wheel free, then removing the nut so you can take the wheel off fully. Mine didn't want to come, but I got away with separating the steering wheel from the hub by removing the 6 screws holding it down - this does mean that the column stalks won't come off though.
Remove the steering column shroud via the screws from underneath.
Now you can remove the gauges. First remove the wooden dash trim panel, along with the one around the ventilation controls. Remove the horrible flimsy plastic trim around the fog light / heated rear window switches. Remove the 4 screws holding the metal gauge panel in place. Ease the gauge panel forwards, reach in behind and unscrew the knurled ring holding the speedo cable to the speedo (you may need to disconnect the cable from guides in the engine bay to get enough free play). You can now pull the whole gauge panel a bit further out, so you can reach the single multiplug that connects all the gauge electrics; now the gauge panel can be remove completely.
Next the ventilation panel. Unscrew the ventilation control panel from the metal plate. The metal plate can then be withdrawn; disconnect the fog light/rear screen heater/ice warning units, best take a photo of the wiring before you do so you can see how they reconnect later! The dash vents simply pull away from the rubber tunnels (or in many cases they aren't even properly connected, they are a pig to get connected properly!). The plate with the vents and switches can be removed completely; I left the ventilation control hanging in place, they don't need to be disconnected and removed.

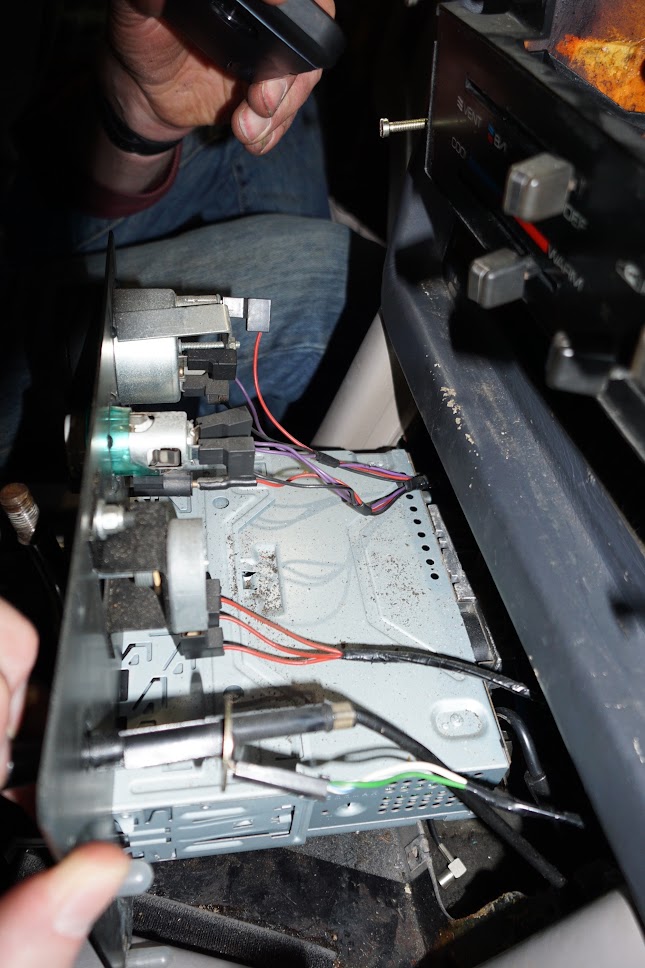
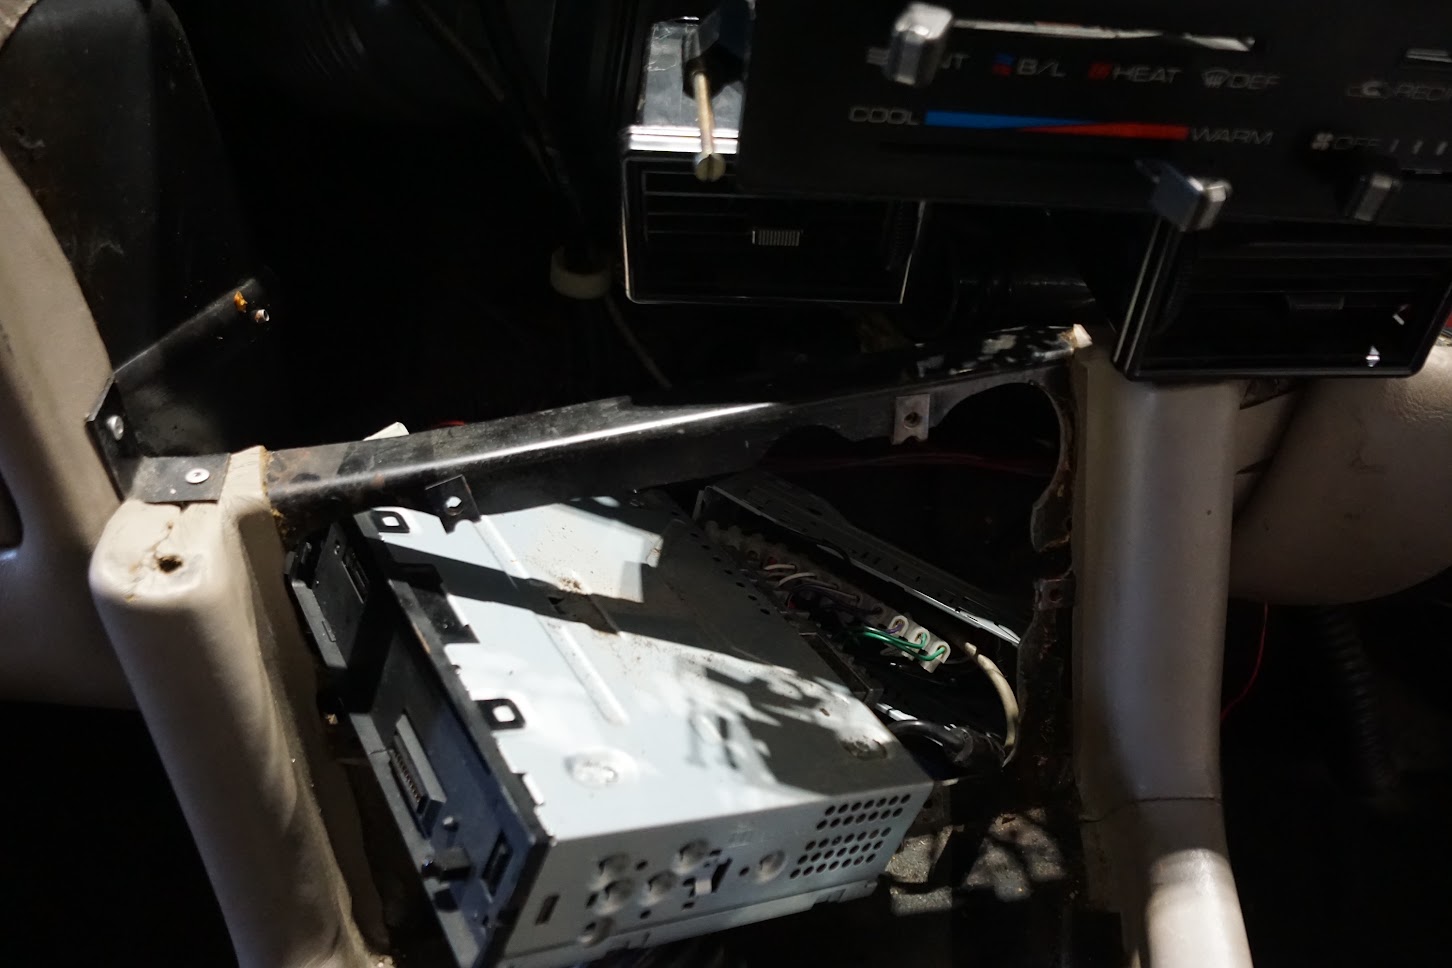
Next, the panel around the stereo and clock/gauge dimmer/choke. The front section simply pulls away, it is held in place with 4 "fir tree" fixings (see photo below - the bottom two "fir trees" have been pushed sideways by a Previous Owner not getting them properly aligned!). It will squeeze over the choke knob. Remove the screws holding the metal plate in place. The choke knob will not pass through this panel, so the whole choke cable needs to come away with this plate; disconnect both inner and outer choke cable at the carburettor, the cable passes through the bulkhead to the lower right of the wiper motor. The plate can then be moved forward, and the clock, dimmer knob, and radio disconnected (photograph the wiring first so you know how it goes back, particularly the dimmer - or refer to photo below). My radio wiring was bodged up using a terminal block by some cowboy (OK, me) so a faff to undo; I pulled the radio from its cage, then pulled the cage out and bent it so it would go back through the hole, so I could leave the radio loosely in place.

Find the ducts that go to the dash side vents, and pull them off the heater distribution box.
Now we're finally ready to remove the dash. Ideally the binnacle around the gauges should be removed first, then the full-width dash. If you haven't managed to get the steering wheel hub off, you may not be able to remove the dash with the binnacle still attached. The problem is, there's one nut that can be a bastard to undo, so let's start with that one and if that works OK then the rest are easy.
The binnacle will lift off the dash vertically, so it's held in place by embedded studs that all point downwards. The bastard one goes through the hole you can see in the centre-left of the the picture below. The nut is not a hex, it just has a knurled outer surface, and is stuck into the end of a 4" piece of silicone hose. The idea is that you reach into the space behind that "pillar" to the left of the radio, find the hose, and twiddle until the nut unscrews. Unfortunately it is made of the same material as the fuel tank vent hose, and, similarly, after 30 years it'll be a brittle crumbly mess. In my case, Phil Tanz was a star and managed to find and unscrew the nut with his fingers after the hose had crumbled off.
The rest of the nuts come off easily with a 10mm spanner; to give you an idea where to find them this is what the binnacle looks like (from behind) once removed:

With all the nuts removed (try not to lose too many washers!) the binnacle will lift upwards - it could be quite well stuck to the dash, but enough persuading and it will move.
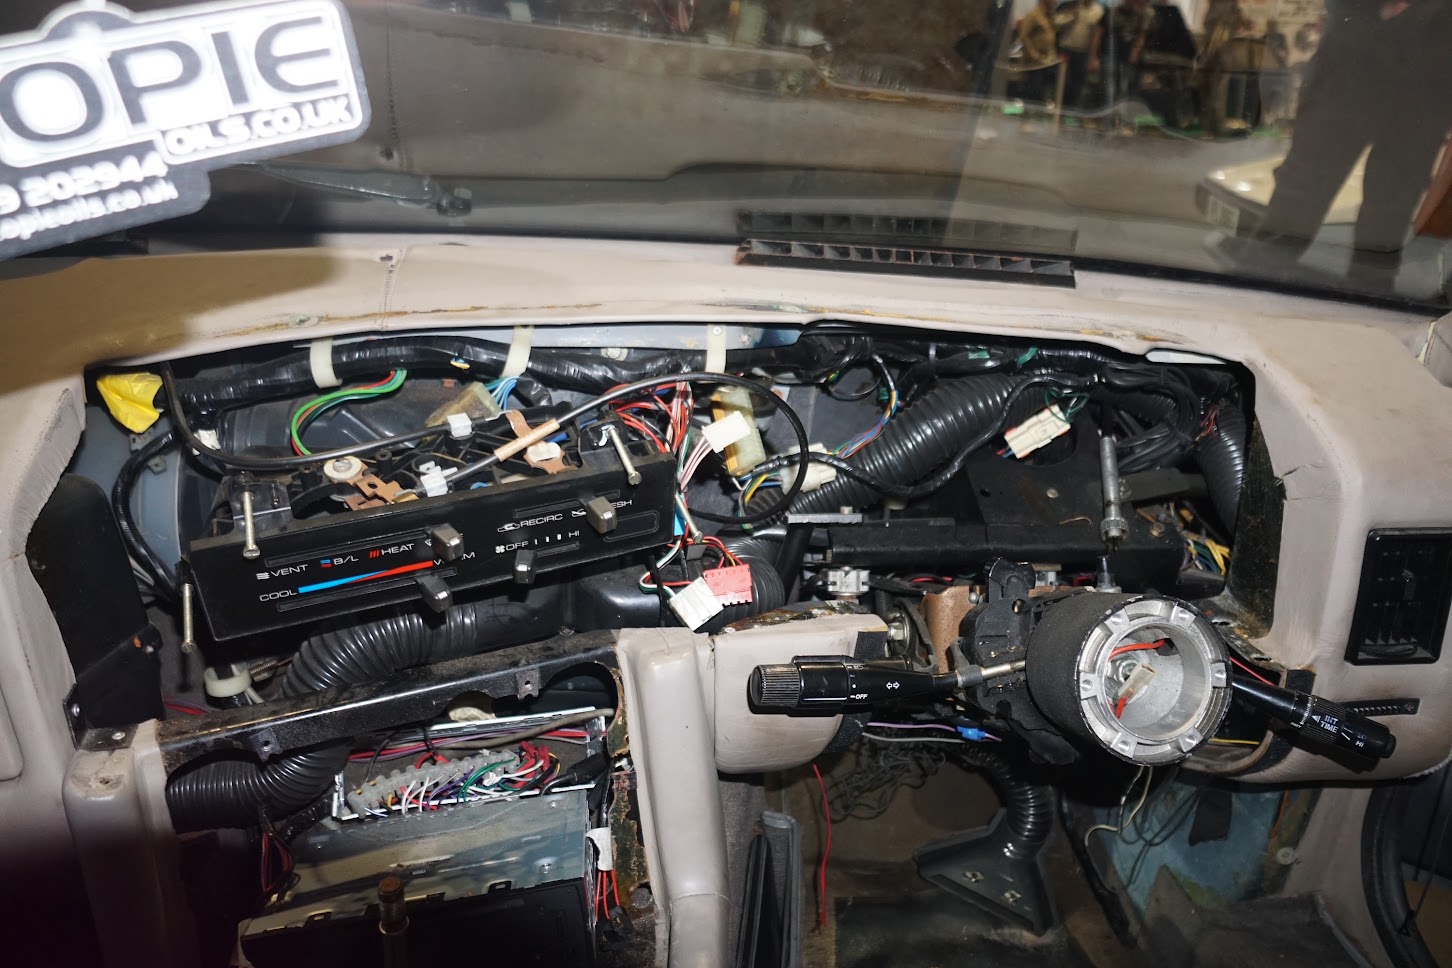
Finally the dash itself. Remarkably this is held in place at just four locations - by a couple of screws at each end (remove the footwell trim pieces to access, see photo below), by one screw in the centre (prise off the black plastic dome to get to it), and by a pair of screws into the transmission tunnel.

The dash should now be free. I didn't remove mine completely, because the slot for the immobiliser had been installed in a way that wasn't easily disconnected, and the wiring not easily disconnected, but I had the access I needed for the repairs/maintenance I wanted to do.
Assembly, to quote everyone's favourite workshop manual, is the reverse of removal. Yes, it really is, the only points I'd note are:
- I was advised not to replace the bastard nut, as it'll all hold in place just fine without it. I ignored that advice because I like the idea of it going back the way it was before, but I did put some new silicone hose on the knurled nut, and I didn't do it up at all tight.
- Try and remember everything you disconnected during the disassembly stage, it'll be a PITA to find the fog lights don't work because you forgot to connect them again. Yes, my fan currently doesn't work, and the wipers on full speed only, so I need to go back and make sure they are properly connected

- Put the ventilation control panel back first, that will give you the best access to try and get the dash centre vents properly connected. It'll be easier if you can free the vents from the metal plate, that gives you more manouverability and you can do one at a time - left one first. After much discussion and checking other cars, the correct way is for both to have their control wheels on the left. They are not the same length; the longer one goes on the left. Don't put the wooden trim panel on yet.
- Put the stereo / clock / dimmer / choke panel back next - you want still to have access behind the gauges so you can feed the choke cable back through its grommet on the bulkhead.
- Now you can put the gauges panel back in, but not it's wooden trim.
- Replace the horrible flismy plastic around the fog light/heated rear window switches. Now you can finally replace the wooden facia trims.